There’s something magical about the open road—the promise of adventure, the freedom to change course on a whim, and the joy of discovering hidden gems along the way. But for those of us navigating grain-free dietary needs, that romance quickly collides with reality when hunger strikes and roadside options are limited to processed snacks and wheat-heavy meals. Dehydrated foods have emerged as a brilliant solution—lightweight, shelf-stable, and nutrition-dense. Yet here’s the catch: transforming those shriveled vegetables and protein pieces into palatable meals requires water, time, and technique—three resources that feel impossibly scarce when you’re cruising down the interstate with nothing but a cramped backseat and a vague sense of where you’ll sleep tonight.
The good news? You don’t need a fully-equipped camp kitchen or expensive gadgets to master grain-free dehydrated meal prep on the road. With a handful of DIY hydration hacks and some strategic planning, you can turn your vehicle into a mobile kitchen capable of producing restaurant-quality meals that honor your dietary needs and your adventurous spirit. These methods leverage everyday items, physics, and a bit of road-smart ingenuity to ensure you never have to choose between your health and your wanderlust.
Top 10 Grain-Free Dehydrated Food for Road Trips
Detailed Product Reviews
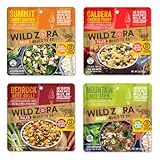
1. Wild Zora Paleo Freeze Dried Meals for Backpacking & Camping - Healthy Gluten Free & Grain Free Camping Meals/Backpacking Food + No Added Sugar - Includes Breakfast & Dinner Options (Variety 7-pack)

Overview: Wild Zora’s 7-pack delivers paleo-compliant freeze-dried meals designed for health-conscious adventurers. This variety bundle includes both breakfast and dinner options, featuring grass-fed beef and free-range chicken paired with nutrient-dense vegetables. Manufactured in small batches in Loveland, Colorado, these meals cater to those following strict dietary protocols while maintaining the convenience essential for backcountry travel.
What Makes It Stand Out: The brand’s commitment to whole-food nutrition without compromises sets it apart. Unlike typical camping meals loaded with pasta and rice fillers, Wild Zora derives protein exclusively from high-quality meat sources—no protein powders or artificial additives. The inclusion of vegan-friendly breakfast options featuring grain-free cereals with fruits and nuts demonstrates thoughtful variety. As a woman-owned, family-operated business, their transparent sourcing and small-batch production create a premium, ethically-conscious product.
Value for Money: At $99.99 ($4.76/ounce), each meal costs approximately $14.28—positioning this at the premium end of the freeze-dried spectrum. While significantly pricier than conventional options ($8-12/meal), the value lies in the ingredient quality: grass-fed meats, organic vegetables, and strict paleo compliance justify the cost for those with dietary restrictions. The convenience of ready-to-eat packaging and elimination of meal-planning effort adds intangible value for serious backpackers.
Strengths and Weaknesses: Strengths include exceptional ingredient transparency, high protein content from real meat, compliance with paleo/AIP diets, lightweight packaging, and ethical small-batch production. Meals require only hot water and can be eaten directly from the pouch. Weaknesses center on the premium price point, potentially smaller portion sizes compared to carb-heavy alternatives, and limited appeal for those without dietary restrictions who may find traditional meals more satisfying and economical.
Bottom Line: Ideal for paleo-dieters and health-focused campers who prioritize ingredient quality over cost. The premium price delivers genuine nutritional value, making it worth the investment for those who treat dietary compliance as non-negotiable in the wilderness.
2. Wild Zora Paleo Freeze Dried Meat Meals, 4 Pack, Gluten Free and Grain Free Camping and Backpacking Food, No Added Sugar, Healthy On-the-Go Travel Meal, Protein Packed (Meat 4-pack)
Overview: This streamlined 4-pack from Wild Zora focuses exclusively on savory meat-based meals, delivering AIP-compliant nutrition for outdoor enthusiasts. Each single-serve pouch contains either Mountain Beef Stew or Summit Savory Chicken, formulated without nightshades or inflammatory ingredients. With a 36-month shelf life and lightweight design, these meals target backpackers seeking maximum protein with minimal processing.
What Makes It Stand Out: The AIP compliance (Autoimmune Protocol) is a rare find in the camping food market, eliminating nightshades, grains, and additives that trigger inflammation. The protein-to-weight ratio excels—each meal packs substantial nutrition without carbohydrate fillers. The freeze-drying process preserves both macronutrients and micronutrients from organic vegetables and grass-fed/free-range meats. The 4-pack configuration suits shorter trips or serves as a supplement to other provisions.
Value for Money: Priced at $57.99 ($4.83/ounce), individual meals cost roughly $14.50—nearly identical to the 7-pack’s per-meal rate. This remains premium territory, but the AIP specialization creates a niche without direct competition. For those managing autoimmune conditions, the ability to maintain dietary protocols in remote environments is invaluable. The 36-month shelf life also means unused meals won’t expire, reducing waste.
Strengths and Weaknesses: Strengths include strict AIP compliance, clean ingredient sourcing, high satiety from protein and healthy fats, rapid preparation (just hot water), and excellent shelf stability. The nightshade-free formulation is genuinely unique. Weaknesses include the high cost-per-meal, limited variety with only two flavor options, and portion sizes that may prove insufficient for high-calorie-burn activities like mountaineering or long-distance trekking.
Bottom Line: A specialized solution for AIP-dieters and those with food sensitivities. While expensive, it fills a critical market gap. Perfect for weekend warriors or as a reliable emergency meal option for anyone prioritizing anti-inflammatory nutrition.
3. BIGHORN Mountain Food Rich & Creamy Pasta Carbonara - premium freeze dried meals for backpacking food - dehydrated camping food for backpacking meals - 2 servings

Overview: BIGHORN’s Pasta Carbonara delivers a comfort-food experience in freeze-dried form, offering two hearty servings per pouch. This premium dehydrated meal emphasizes bold flavors and substantial portions, targeting backpackers who refuse to sacrifice taste for convenience. Proudly manufactured in the USA, it provides a familiar, calorie-dense option for outdoor adventurers seeking traditional meal profiles rather than dietary-specific formulations.
What Makes It Stand Out: The carbonara’s rich, creamy sauce and generous meat portions create a restaurant-quality experience uncommon in backcountry cuisine. Unlike many competitors that skimp on protein, this meal delivers substantial calories and energy for demanding physical activities. The recyclable packaging through TerraCycle partnership addresses environmental concerns—a rarity in the single-use pouch market. The two-serving format offers flexibility for couples or a single hiker wanting a large meal.
Value for Money: At $17.95 for two servings ($8.98 per serving), this positions itself as a mid-range option—more affordable than premium paleo meals but pricier than budget brands like Mountain House. The value proposition centers on portion size and flavor complexity rather than ingredient certifications. For those without dietary restrictions, it delivers better cost-per-calorie than specialized alternatives, making it practical for extended trips.
Strengths and Weaknesses: Strengths include exceptional taste and texture, high caloric density, generous protein portions, straightforward preparation, and environmentally-conscious packaging. The familiar comfort-food profile boosts morale on long expeditions. Weaknesses involve standard ingredient sourcing (not organic or grass-fed), higher sodium typical of freeze-dried meals, and unsuitability for gluten-free or paleo diets. The two-serving pouch may prove inconvenient for solo hikers wanting precise portions.
Bottom Line: An excellent choice for mainstream backpackers prioritizing flavor and value over specialty diet compliance. The TerraCycle program and hearty portions make it a responsible, satisfying option for traditional camping cuisine.
4. BJ’S RAW PET FOOD Freeze Dried Vitality Complete Mix Protein Rich Nutritious Meal for Optimal Health Made in USA, 14-Ounce
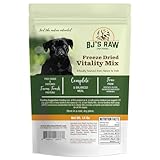
Overview: BJ’s Raw Pet Food offers a freeze-dried complete meal mix designed for canine nutrition, not human consumption. This 14-ounce package contains a protein-rich blend of raw duck, rabbit, organ meats, and vegetables, formulated to provide dogs with optimal health benefits. The freeze-drying process preserves nutrients while enabling convenient storage and transport—ideal for traveling pet owners or as a supplement to traditional kibble.
What Makes It Stand Out: The novel protein sources (duck and rabbit) cater to dogs with poultry or beef allergies, while the inclusion of organ meats provides nutrient density rarely found in commercial pet foods. The “just add water” preparation makes it exceptionally convenient for camping trips or emergency situations. As a small, family-oriented company using locally-sourced ingredients, BJ’s emphasizes ethical production and transparency. The raw diet philosophy appeals to pet owners seeking ancestral feeding approaches.
Value for Money: At $43.99 ($3.14/ounce), this premium pet food costs significantly more than conventional kibble but aligns with other raw freeze-dried dog foods. The 14-ounce package yields multiple meals depending on dog size, making it economical for supplemental feeding or small breeds. For owners already committed to raw feeding, the convenience factor justifies the price, especially when traveling where refrigeration isn’t available.
Strengths and Weaknesses: Strengths include high-quality, novel protein sources, digestibility enhanced by freeze-drying, suitability for dogs with food sensitivities, convenient preparation, and USA-sourced ingredients. The raw formulation supports dental health and coat quality. Weaknesses involve the premium price prohibiting exclusive feeding for large dogs, potential bacterial concerns inherent to raw diets (despite freeze-drying mitigation), and the need for careful portion control to avoid overfeeding.
Bottom Line: A worthwhile investment for health-conscious pet owners seeking convenient raw nutrition. Best used as a supplement or travel solution rather than a primary diet for most households due to cost. The quality ingredients justify the premium for those prioritizing canine wellness.
Why Grain-Free Dehydrated Food Demands Special Hydration Attention
Grain-free dehydrated foods behave fundamentally differently than their grain-based counterparts. Without starchy binders to absorb water quickly and create uniform texture, you’re working with ingredients that rehydrate at wildly different rates. A dehydrated sweet potato cube might need 20 minutes, while kale crisps could turn to mush in five. This variability demands a more thoughtful approach than simply “add water and wait.”
The Unique Challenges of Grain-Free Ingredients
When you remove grains from the equation, you’re typically working with pure vegetables, fruits, meats, and legumes—each with distinct cellular structures. Fibrous vegetables like zucchini and bell peppers develop tough, chewy cores if under-hydrated. Protein sources such as dehydrated eggs or meat crumbles can become rubbery or develop off-flavors if exposed to the wrong water temperature. Understanding these material properties is your first step toward consistent success.
Road Trip Constraints: Space, Power, and Time
Your vehicle isn’t a commercial kitchen. You lack stable surfaces, consistent power sources, and temperature control. Every hydration hack must account for motion, vibration, and the occasional abrupt stop. The methods we’ll explore are specifically designed for the mobile environment, prioritizing leak-proof containers, minimal equipment, and passive processes that don’t require your constant attention while driving.
The Science of Rehydration: What Actually Happens to Your Food
Rehydration isn’t simply waterlogging dried ingredients—it’s a complex process of cellular restoration. When you dehydrate food properly, you remove water while leaving the cellular structure largely intact. The goal of rehydration is to coax water back into those cells without destroying their walls or leaching out nutrients.
Understanding Cellular Structure and Water Absorption
Dehydrated vegetables retain their cellulose frameworks, which act like microscopic scaffolding. Water must penetrate these frameworks and re-inflate the cells from within. The process happens in three stages: surface wetting, capillary action through the cell walls, and finally, osmotic pressure equalization inside the cell. Grain-free foods often lack the gelatinized starches that would normally accelerate this process, meaning you need to be more patient and precise with water ratios.
The Role of Temperature in Rehydration Speed
Temperature dramatically affects rehydration kinetics. Hot water (near boiling) works fastest because it reduces water viscosity and increases molecular motion, allowing water to penetrate cells more quickly. However, some grain-free ingredients—particularly delicate greens and certain proteins—can denature or overcook in high heat. Cold water preserves nutrient integrity and texture but requires significantly more time, sometimes up to several hours. Room temperature water offers a middle ground but introduces food safety concerns if soaking extends beyond safe time limits.
Building Your Mobile Hydration Kit: Essential Components
Your road trip hydration kit should fit in a single, accessible tote or backpack compartment. The key is versatility—every item should serve multiple purposes while being durable enough to withstand temperature fluctuations and movement.
Container Selection: Materials That Work
Glass mason jars excel for pre-planned meals but require padding to prevent breakage. Food-grade silicone bags offer collapsibility and heat resistance, making them ideal for hot-water hydration. Stainless steel vacuum-insulated bottles aren’t just for drinking—they double as cooking vessels for thermos-based methods. Avoid cheap plastic containers, which can leach chemicals when exposed to hot water and may retain flavors from previous meals.
Measuring Tools for Consistent Results
Consistency matters when you’re working with limited ingredients. A compact digital scale that measures in grams ensures you use the correct water-to-food ratio every time. A collapsible measuring cup takes up minimal space but prevents the guesswork that leads to soupy or crunchy meal failures. Consider a small, battery-operated thermometer to verify water temperature—crucial for food safety and texture control.
Water Sourcing Strategies for the Open Road
You can’t hydrate food without water, yet road trips present unique challenges for sourcing safe, clean hydration liquid. Your strategy needs redundancy—never rely on a single source.
Filtering Techniques for Unknown Water Sources
When filling up at campground spigots or rest area fountains, a two-stage approach works best. First, use a carbon filter to remove chlorine and improve taste—critical because dehydrated foods absorb water’s flavor compounds. Second, consider a UV sterilizer pen for biological contaminants. Unlike chemical treatments, UV doesn’t alter water chemistry or introduce off-flavors that could ruin your carefully planned meals.
Storing Emergency Water Reserves
Keep a dedicated, food-grade water container separate from your drinking supply. This prevents cross-contamination and ensures you always have hydration liquid available. Rotate this water every few days, using it to top off your drinking bottles before refilling the food container. This practice keeps the water fresh while maintaining your reserve levels.
Temperature Mastery: Hot, Cold, and Ambient Techniques
Different situations call for different temperature approaches. Mastering all three gives you flexibility regardless of your location, available power, or timeline.
Hot Water Methods: When Speed Matters
Hot water hydration works best when you have access to gas station hot water dispensers, vehicle-powered heating, or can safely heat water at a rest stop. The key is achieving the right temperature—not all foods need boiling water. Meats and dense vegetables benefit from 180-190°F water, while fruits and delicate greens do better at 150-160°F. Always pre-warm your container with a splash of hot water first to prevent temperature drop when you add your meal.
Cold Soaking: Patience Pays Off
Cold soaking is the ultimate low-power technique, perfect for overnight hydration while you sleep in your vehicle. Place your dehydrated meal in a leak-proof container with cold water before bed, and wake up to a ready-to-eat breakfast. This method excels for fruits, soft vegetables, and pre-cooked legumes. The extended soak time allows for more complete nutrient retention and develops deeper flavors as ingredients slowly release their compounds into the surrounding liquid.
Pre-Trip Meal Prep: The 24-Hour Hydration Head Start
Smart preparation before you leave home sets you up for success on the road. A few hours of advance work can eliminate half your hydration headaches.
Partial Rehydration Techniques
Partially rehydrating certain ingredients at home creates a “fast-cook” meal that only needs a quick hot water top-off to finish. Soak dense vegetables like carrots or sweet potatoes for 30 minutes, then dehydrate them again at a lower temperature. This pre-softening breaks down some cellular walls, allowing them to rehydrate in half the time later. Store these “pre-treated” ingredients separately and label them clearly.
Marinade Infusion for Flavor
Before dehydrating proteins or vegetables, marinate them in concentrated flavors. The dehydration process locks these flavors in, and when you rehydrate on the road, the water becomes a flavorful broth. Use salt, acid, and umami components sparingly—they intensify during dehydration. This technique means you’re not just adding water; you’re creating a complete flavor experience with minimal road-trip effort.
The Mason Jar Method: Your Versatile Road Trip Companion
The humble mason jar deserves its reputation as a road-trip hydration hero. Its transparency lets you monitor progress, and the airtight seal prevents disaster during sharp turns. But technique matters more than the container itself.
Layering Strategies for Multi-Ingredient Meals
When building a multi-component meal in a jar, layer ingredients by rehydration time. Place quick-hydrating items like spinach powder or tomato flakes at the bottom, where they’ll be fully submerged. Position slower items like zucchini chunks or meat pieces higher up, where they’ll hydrate more gradually. This prevents some ingredients from turning to mush while others remain crunchy. Add a small piece of parchment paper between layers if you’re preparing several days’ worth of meals in advance.
Sealing Techniques to Prevent Leaks
Standard mason jar lids can fail during temperature changes and elevation shifts. For road trips, use two-piece lids with silicone seals, and always store jars upright in a container with a lip. Wrap the jar’s threads with a single layer of plumber’s tape before screwing on the lid—this creates a more reliable seal without making the lid impossible to remove. For extra security, place the jar in a silicone sleeve that contains any minor leaks.
Thermos Cooking: Slow Hydration for Deep Flavor
A quality insulated bottle isn’t just for coffee—it’s a passive cooking vessel that uses retained heat to slowly rehydrate and cook your meals while you drive.
Preheating Protocols for Maximum Efficiency
To achieve effective thermos cooking, you must preheat the vessel properly. Fill your thermos with boiling water and let it stand for 3-5 minutes, then dump the water and immediately add your dehydrated ingredients plus fresh boiling water. This preheating step prevents initial temperature drop and ensures the contents stay above 165°F for the first critical hour of hydration. For grain-free meals, this method works exceptionally well for stews and soups where you want flavors to meld.
Timing Guidelines for Different Foods
Dense root vegetables need 2-4 hours in a thermos to fully rehydrate, while leafy vegetables and fruits may be ready in 30-60 minutes. Proteins are trickier—dehydrated meat pieces require at least 2 hours at sustained temperature to become tender and safe. Plan your thermos meals around your driving schedule: start a meal before a long stretch of highway, and it’ll be ready when you stop for a break.
Cold Soaking: The Ultimate Low-Maintenance Hack
Cold soaking requires zero power and minimal equipment, making it perfect for remote areas or when you’re conserving vehicle battery. The technique is simple, but optimization makes the difference between edible and delicious.
Best Candidates for Cold Soaking
Not all grain-free dehydrated foods cold-soak well. Stick with ingredients that are naturally tender or pre-cooked: bell peppers, tomatoes, mushrooms, spinach, pre-cooked beans, and freeze-dried fruits. Avoid trying to cold-soak raw dehydrated meats or dense, starchy vegetables like butternut squash—they’ll remain unpleasantly crunchy even after hours of soaking. Create specific “cold-soak only” meal blends before your trip to avoid disappointment.
Container Options for Secure Transport
For cold soaking while driving, you need containers that won’t leak even when jostled. Silicone bags with sliding zip closures work well when placed inside a rigid container as backup. Wide-mouth plastic jars with screw-top lids and silicone gaskets offer a good balance of security and accessibility. Always position cold-soak containers in a cooler or insulated bag to maintain a safe temperature—below 40°F prevents bacterial growth during extended soaks.
Vehicle-Powered Innovation: 12V and USB Solutions
Your vehicle’s electrical system is an untapped resource for on-demand hot water. Modern options are safer and more efficient than the old cigarette-lighter heating coils.
12V Kettle Safety Considerations
12V kettles designed for automotive use can bring water to a rolling boil in 15-20 minutes, but they draw significant current. Only operate them while your engine is running to avoid draining your battery. Place the kettle in a stable, upright position—many models have wide bases specifically for this purpose. Never fill beyond the maximum line; road vibrations can cause water to slosh and potentially contact electrical components.
USB-Powered Heating Elements
Newer USB-powered immersion heaters offer a lower-wattage alternative for warming water to rehydration temperatures rather than full boiling. These draw less power and can often run from a portable power bank. While slower than 12V kettles, they’re ideal for maintaining water temperature in an insulated container or for gentle heating that won’t damage delicate ingredients. Look for models with automatic shutoff features to prevent overheating.
Solar Hydration: Eco-Friendly Road Trip Cuisine
Harnessing the sun’s energy for food hydration embodies the self-sufficient spirit of road tripping. This method works best in sunny climates and requires planning, but costs nothing to operate.
DIY Solar Heater Construction
Create a simple solar water heater using a black-painted metal water bottle inside a reflective windshield sunshade formed into a parabolic trough. Position this on your dashboard while parked, angling it toward the sun. In direct sunlight, you can achieve 140-160°F water in 1-2 hours—perfect for most rehydration needs. The black bottle absorbs heat while the reflective shade concentrates solar energy. Always place a thermometer strip on the bottle to monitor temperature and prevent scalding when you open it.
Optimizing for Weather Variables
Solar hydration depends on conditions, so build flexibility into your plans. On partly cloudy days, extend heating time by 50% and consider pre-warming your container with body heat (tuck it in your jacket for 10 minutes). In cold but sunny weather, insulate your solar heater with a blanket or towel, leaving only the reflective surface exposed. This traps heat while still allowing sunlight collection. Have a backup plan for cloudy days—this method is a supplement, not a sole solution.
Beyond Water: Creative Hydration Liquids
Water isn’t your only option for rehydrating grain-free meals. Alternative liquids can add nutrition, flavor, and functional benefits that elevate road-trip dining.
Broth-Based Rehydration for Nutrition
Carrying dehydrated bone broth or vegetable broth powder transforms your hydration liquid into a nutrient-dense solution. These powders weigh almost nothing and pack substantial minerals and collagen. When rehydrating, use a slightly lower ratio of broth powder to water than you would for drinking—your food will concentrate the flavors further. This technique is particularly valuable for grain-free meals that might otherwise lack the savory depth that grains typically provide.
Coconut Water for Natural Electrolytes
For breakfast blends or fruit-heavy meals, consider using coconut water powder as your hydration base. The natural electrolytes help with hydration on hot driving days, and the subtle sweetness complements many grain-free ingredients. Mix the powder with your water in a separate container before adding to your food to ensure even distribution. This approach turns your meal into a functional recovery food after long hikes or hot days exploring.
Troubleshooting: When Your Food Won’t Rehydrate Properly
Even with perfect technique, you’ll encounter rehydration failures. Knowing how to diagnose and fix problems mid-trip separates the novice from the expert.
Identifying Hard Spots and Solutions
Hard, crunchy spots in your rehydrated meal indicate uneven water distribution or insufficient time. For immediate fixes, add a tablespoon of water, seal the container, and massage it vigorously to redistribute moisture. Let it rest for 10 more minutes. To prevent this issue, break up clumps before adding water and shake the container vigorously after the first 5 minutes of hydration. For stubborn spots, a few seconds in a microwave at a rest stop (if available) can provide targeted heating.
Adjusting for Altitude and Humidity
High altitude reduces water’s boiling point and can slow rehydration, while low humidity causes water to evaporate from your container before it absorbs into food. At altitude above 5,000 feet, increase your soak time by 25% and use slightly hotter water. In dry climates, wrap your hydrating container in a damp bandana or paper towel to create a micro-humidity environment that prevents moisture loss. These small adjustments make the difference between a satisfying meal and a disappointing one.
Food Safety in Your Mobile Kitchen
Your vehicle’s temperature fluctuations create a food safety minefield. Grain-free dehydrated foods are less forgiving than grain-based ones because they lack the antimicrobial properties of fermented grains or the protective starch matrix.
Temperature Danger Zone Awareness
The danger zone between 40°F and 140°F is where bacteria multiply rapidly. Never let rehydrating food sit in this range for more than 2 hours total. If you’re cold soaking, keep the container in a cooler with ice packs. For hot methods, ensure the food stays above 140°F until consumed. Use a small thermometer to spot-check temperatures, especially for meats. When in doubt, reheat to 165°F before eating—many vehicle power inverters can run a small immersion heater for this purpose.
Cleaning Protocols Without Running Water
Without reliable water access, cleaning your hydration containers becomes challenging. Carry a spray bottle with a diluted vinegar solution (1 part vinegar to 3 parts water) to sanitize surfaces. After emptying a container, spray it thoroughly, let it sit for 2 minutes, then wipe with a clean paper towel. For deeper cleans, use biodegradable camp soap and minimal water, then rinse with a spray bottle of clean water. Always dry containers completely before reuse—residual moisture breeds bacteria in warm vehicles.
Packing Smart: Space-Efficient Hydration Logistics
Every cubic inch in your vehicle matters. Your hydration system should pack flat, nest together, and serve multiple functions to justify its space.
Modular Packing Systems
Organize your hydration kit into modules: a “hot water” module (kettle, thermos, measuring tools), a “cold soak” module (silicone bags, cooler packs), and a “consumables” module (broth powders, coconut water powder). Store each module in a zippered mesh bag that allows items to dry if damp. This system lets you grab only what you need for a specific meal rather than rummaging through everything. Nest smaller containers inside larger ones when possible, and store dry ingredients in the void spaces of your hydration equipment.
Waste Reduction Strategies
Minimize waste by planning your water usage carefully. After rehydrating a meal, the residual liquid often contains nutrients and flavor. Use it to start the next meal’s hydration or drink it as a savory “tea.” For cleaning, use the same small amount of water sequentially—first rinse the cleanest container, then use that water for the dirtiest. Carry a small funnel to transfer liquids between containers without spills, conserving every drop. This approach reduces your water carrying needs and environmental impact.
Frequently Asked Questions
How long can I safely store rehydrated grain-free meals in my vehicle?
Rehydrated meals should be consumed within 2 hours if kept at room temperature. If you’re using a cooler that maintains below 40°F, you can extend this to 24 hours. Always store rehydrated foods separately from raw dehydrated ingredients to prevent cross-contamination, and never reuse the soaking liquid for a new batch without boiling it first.
What’s the ideal water-to-food ratio for grain-free dehydrated meals?
Start with a 1:1 ratio by weight for most vegetables and fruits, then adjust based on results. Dense proteins may need 1.5:1, while leafy greens might need only 0.75:1. The key is consistency—measure and record what works for each recipe, then refine. Your first few meals are experiments; after that, you’ll have personalized ratios that work perfectly.
Can I rehydrate grain-free meals while actually driving?
Yes, but only with cold-soak methods in completely leak-proof containers. Place the container in a stable, upright position inside a cooler or rigid box. Never attempt hot water hydration while driving—spills cause burns and dangerous distractions. Plan ahead so your meal is ready when you stop, not while you’re navigating traffic.
Why does my rehydrated cauliflower rice always turn mushy?
Cauliflower rice dehydrates into extremely small pieces with massive surface area, causing it to absorb water almost instantly. Reduce your water by 30% and shorten soak time to 5-10 minutes. Better yet, add cauliflower rice last, after other ingredients have partially rehydrated, to control its exposure to moisture.
Is it safe to use water from campground spigots for rehydration?
Only if you treat it first. Campground water quality varies dramatically and can contain bacteria, heavy metals, or excessive minerals that affect taste and safety. Always filter through a carbon filter and consider UV treatment. When in doubt, bring the water to a rolling boil for one minute before using it for food hydration.
How do I prevent my dehydrated meals from tasting bland after rehydration?
The dehydration process concentrates flavors, but water dilutes them upon rehydration. Add 25% more seasoning than you think necessary before dehydrating, and include a small packet of finishing salt or acid (like citric acid powder) to brighten flavors just before eating. The “blandness” often comes from missing the flavor boost that grains typically provide.
Can I mix hot and cold hydration methods in the same meal?
Absolutely, and this hybrid approach often yields the best texture. Cold-soak dense vegetables for 2-3 hours, then add a small amount of hot water and let sit for 10 minutes to finish. This prevents overcooking while ensuring complete rehydration. Think of it as a two-stage process that gives you control over each ingredient’s final texture.
What’s the most power-efficient way to heat water in my vehicle?
USB-powered immersion heaters drawing from a portable power bank are most efficient for small amounts (1-2 cups). For larger volumes, a 12V kettle is faster but drains your vehicle battery if the engine isn’t running. Solar heating costs zero power but requires sun and time. For maximum efficiency, combine methods: preheat water with solar, then finish with a quick burst from a USB heater.
How do I handle rehydration at high altitudes where water boils at lower temperatures?
Lower boiling points mean less aggressive hydration. Extend soak times by 25-40% and use a thermos method to maintain higher temperatures longer. Consider pre-treating ingredients at home with a brief steam before dehydrating—this partially breaks down cell walls, making altitude rehydration more reliable. Always use a thermometer; “boiling” at 10,000 feet is only 194°F, which feels lukewarm to food.
Are there any grain-free dehydrated foods that should never be rehydrated on the road?
Raw dehydrated eggs and unpasteurized dehydrated dairy products pose significant food safety risks without precise temperature control. Additionally, some dehydrated seeds and nuts develop rancid flavors when rehydrated improperly. Stick with commercially dehydrated or properly home-dehydrated vegetables, fruits, and fully cooked proteins for safe, reliable road-trip meals.